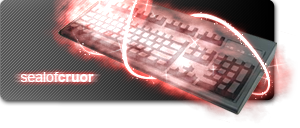
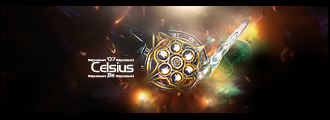
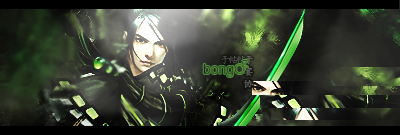
Here goes...
Well, the effect has 9 layers, including the object you are adding the seal to.
Their structure is like this:
[Group]<Linear Dodge (Add)>
Gradient Map <Normal>
Lens Flare <Screen>
Sparkles <Normal>
Particles <Normal>
Threads <Normal>
Mist <Normal>
[/Group]
Object <Normal>
[Group] <Lighten>
Gradient Map <Normal>
Mist <Normal>
[/Group]
For the mist layer of the first group, take this smoke texture which is the one used ingame:

Paste copies of it over each other, using the screen blending mode, until you have enough area covered for your object. Then randomly rotate each copy to make the texture random and merge the layers together. Next use the transform tool to skew, rotate and scale your smoke until it lies on the same plane as your object. Finally, make a quick mask on the layer by simply using the layer contents. Put it into a new group above your object in the layer stack, and use the Linear Dodge blending mode for the group.
Next you need to make the threads of light. They typically weave around the object in a double-helix arrangement. To make them, make a new layer above the Mist layer, take the pen tool and make a couple of curvy paths that zig-zag across your object. Now change to your brush tool and make the brush white, around 3px wide, larger if your object is bigger, and give it 100% hardness. Open up the brushes palette and click on Shape Dynamics. Turn Size Jitter all the way down to 0% and make sure the Control dropdown is set to Pen Pressure. Now switch back to your pen tool and for each path you made, select it and right click then click on Stroke Path making sure Simulate Pressure is checked and click OK. That should give you nice tapered lines. Now make a selection around your object and go in with the eraser to remove parts of the threads which should be behind your object.
Now you can add the particles which surround the threads. Make a new layer, and go back to your brush tool. Change the size to be around 2px (larger if your threads are larger) then open up the brushes palette again. Under Shape Dynamics, max Size Jitter. Under Scattering, Set Scatter to around 350% or more depending on your thread size. Now go to your pen tool and like before, select each path then stroke it using your scattering brush. Now just erase the particles which should be hidden, you can probably go without a selection around your object.
The next layer is your sparkles. for these, just find a nice sparkle brush (I used the one from the default Assorted Brushes set), and in the brushes palette under Shape Dynamics give it 100% Size Jitter and Angle Jitter. Now put sparkles wherever you see fit. You can play with the opacity a bit depending on how visible you want them to be.
The final layer in this group is the lens flare which isn't so visible in my sig. To make it, make a new layer filled with black and go to Filter->Render->Lens Flare, the default settings are fine. Desaturate the layer to take away the lens flare's color then make a quick mask using the layer contents and play around with the brightness and contrast of that until you are happy with how it looks.
Now you need to make the second layer of mist underneath your object. Make a new group underneath the object, setting its blending mode to lighten. Now follow the same process you used to make the mist above to make a new mist texture (don't just copy and paste the one you made before). Once you have that layer finished, you are done with the hard part.
The final step is adding color to your seal. Start off by changing to your object's layer, and apply a photo filter with whatever color seal you want in order to get rid of any opposing tones. Now go to the top group and place a gradient map in the top of the group. The gradient map should go from black at 0% to your seal's color at 50% to white at 100%. Save it as a new gradient for later use. Change to your threads layer and go into blending options. Add an Outer Glow, the default settings should be fine, using your seal's color. Next go to the bottom group and add another gradient map in the top of the group, using the same gradient as before.
You may need to clean up your quick masks but other than that you should have a seal glow effect that looks quite similar to mine. If you want a moon glow, omit the mist. If you want a star glow, omit the threads. I hope all this wasn't too confusing.


